 KIDS for Families
If your child is starting primary school you can try our Moving On To School questionnaire. This will give you activity ideas to develop some of the skills needed to join in at school.
Moving On To Primary School
Warning
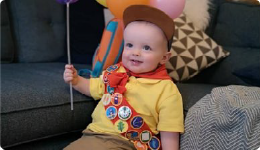
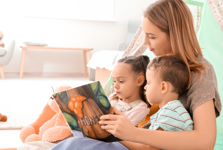
![]() Children in Scotland usually start primary school when they are between 4½ and 5½ years old. This can be an exciting time for children and their families. It can often be overwhelming too. There are lots of things you can do to help your child with moving on to primary school. On this page, you will find lots of ideas and activities you can use. Starting to think about what your child will need to do when they start primary school will help you too. Make sure you spend time playing with your child to help them develop the skills they need. This video tells you all about the resources on this page and how to use them. It also has some other tips for teaching your child new skills.
Children in Scotland usually start primary school when they are between 4½ and 5½ years old. This can be an exciting time for children and their families. It can often be overwhelming too. There are lots of things you can do to help your child with moving on to primary school. On this page, you will find lots of ideas and activities you can use. Starting to think about what your child will need to do when they start primary school will help you too. Make sure you spend time playing with your child to help them develop the skills they need. This video tells you all about the resources on this page and how to use them. It also has some other tips for teaching your child new skills.
At school children might be asked to do some dressing tasks. Dressing needs lots of different skills including coordination and balance. If your child can dress themselves they will be more independent at playtime and with getting changed for PE.
Planning your Child's Primary School Wardrobe
Thinking about the clothes your child wears to school can make it easier for your child. Below are some things to think about:
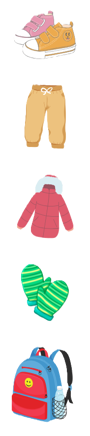 Shoes/Boots
- Slip on, Velcro or zip fastenings.
- Trousers/Bottoms
- Elastic waist band
- Loose fitting
- Avoid tights, try leggings and socks instead.
- Jacket/Coat
- Loose fitting
- Large sturdy zips; add a zip pull to make the tab easier to grasp and pull up
- Velcro or snap fastenings.
- Hats
- Loose fitting or stretchy
- Scarf
- Try a neck tube
- Gloves
- Try mittens that go over the coat sleeve
- Bag
- Rucksack or crossbody bag, big enough to hold change of clothes, water bottle and a book
- Zip closure, add a zip pull to make grasping and opening/closing easier.
- PE Kit
- Loose fitting shorts and t-shirt
- Loose fitting jogging bottoms or leggings
- Supportive Velcro trainers.
Teaching Dressing Skills
Learning new tasks can be tricky. With lots of practice, repetition and patience you and your child should see progress. Start practising dressing tasks with your child at least a few months before they are due to start school. Try and keep the activities fun and short to keep your child interested.
Below is information that you and your child can use together to help them practice different dressing tasks. The videos show the steps of different tasks clearly and slowly. You can pause the videos at any time and use them to help you practice together.
Backward Chaining
When teaching a new skill we often start at the beginning. This can sometimes be challenging for children as they get frustrated. You can give your child a sense of achievement by using the backward chaining technique. Backward chaining is useful when:
- teaching skills with lots of steps like dressing
- teaching younger children
- someone is having difficulty learning new skills.
So what is backward chaining? You start by breaking the task down into small steps. You teach your child the last step first. Meaning you are working backward from the goal. You complete all the steps except the last one. You get your child to practice the final step. Your child will enjoy the success that comes from completing a task. Once your child can do the last step you complete all the steps except for the last two. You teach your child the second from last step and they then complete the last step themselves. Even more success! Keep going until you are teaching the first step and your child is completing all the other steps.
For more information have a look at the Backward Chaining Technique information sheet.
Socks and Shoes
Once your child starts school they might have to change their shoes during the day. Some schools ask for children to change into indoor shoes in the classroom. Some schools ask children to change their shoes for PE. Below is some information to help your child learn to change their socks and shoes.
Socks
- Practice using loose fitting socks that are too big, they could even practice putting on your socks.
- Avoid socks which have overly tight elastic at ankles.
- Socks with different coloured toes and/or heels can make it easier for your child to get their socks the right way round.
- Encourage your child to sit when putting their socks on their feet, as they will be less likely to lose their balance.
- It is often helpful for you to sit next to or behind your child when they are completing this task as it will give you a more realistic view of what things they are finding difficult.
- You can start by putting the socks over your child’s toes and heels and getting them to pull the socks up. Once they can do this just put the socks over their toes and they need to pull them up over their heel and all the way up.
- Encourage your child to place their thumbs inside the sock to help them pulling the socks up or on.
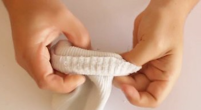 Teach your child to gather up the sock from the top to the heel using two hands, before placing the socks on their toes.
- Some children don't like the feeling of wearing socks and can be particularly bothered by seams, you could try turning your child's socks inside out or buy seamless socks.
Here is a video from our OT colleagues in NHS Forth Valley for helping children put on their socks.
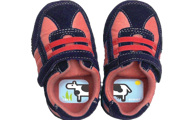
Shoes
- Practice with slip on shoes, slippers and wellies first.
- If your child is going to have to change their shoes in school try to avoid laces or buckles.
- It helps if you sit next to or behind your child when they are putting their shoes on as it will give you a better view of what they are finding difficult.
 Put the shoes in front of your child the right way round and try the sticker trick (cut a sticker in half and stick one half in each shoe) to help them work out which shoe goes on which foot.
- Encourage your child to sit when putting their shoes on, as they will be less likely to lose their balance.
- Get your child to look at their feet to check the shoes are on the right feet.
- Once they have mastered slip on shoes move on to simple fastenings such as Velcro or zips.
Jacket
Once your child is at school they will be expected to take off and put on their own jacket. In primary 1 an adult is usually available to help with fastenings. Here are some tips to help:
- Practice taking off their jacket first – it’s easier!
- Start with a jacket that is a bit too big. Loose-fitting clothing is easier to manage than tight-fitting clothing. Let them practice putting on your jacket. Make it into a game.
- Your child needs lots of practice putting their arms into sleeves. So practice with shirts, cardigans, pyjama tops, etc.
- If your child is struggling it can be tempting to take over - don't! Give your child time to work it out for themselves. Give them lots of encouragement and hints if you need to. If needed, talk them through what to do and only step in if they get really stuck. Make sure you have got plenty of time to practice.
- Instead of correcting a mistake (like a twisted collar or hood) why not encourage your child to look in the mirror. Now get them to work out what's wrong. You may need to ask them some questions and give them some hints.
- There are different ways you can put on your jacket. Try them all to see which way works for your child. The videos below show 2 different ways to put your jacket on. Once you have found the way that suits your child share this with other people. Make sure nursery/school staff, grandparents, child minder etc. all help the same way.
Fastenings
Learning to do fastenings can be tricky. Like many other skills children need to be taught how to do this. In primary 1 an adult is usually around to help with fastenings.
Zips
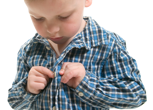
Zips are usually the first fastenings that children learn to do. Their first zip is usually on their jacket. Children will need help to put the zip together to start with. To help your child be independent at school:
- Look for clothing without zips. Velcro fastenings or elasticated waists will let your child be independent. Once they learn how to do a zip you can buy clothes with zips.
- If your child has a jacket with a zip, you can do the zip for them. Make sure the jacket is a bit too big. Your child can pull their jacket over their head with the zip already fastened. They then push their arms through the sleeves. Remind your child to take their jacket off without undoing the zip all the way.
Teaching Zips
- Practice opening and closing lots of zips. Zips on pencil cases and bags are easier to start with.
- When you start practicing zips on clothes lay the item of clothing on a table or bed in front of your child. This will make it easier for them to see what they are doing. Once they can do this get them to practice with the clothing on their body.
- Use backward chaining to teach your child how to do zips:
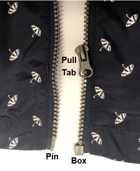 Get your child to put their jacket on. You then start the zip for them. Put the pin into the box and pull the zip up a little bit. You hold the bottom of the zip. Get your child to pull the zip up to the top. Practice this until your child pulls the zip up every time.
- Now, get your child to put their jacket on. You then start the zip for them. Put the pin into the box and pull the zip up a little bit. Get your child to hold the bottom of the zip and pull the zip up to the top. Practice this until your child pulls the zip up every time.
- This time, get your child to put their jacket on. Get your child to put the pin into the box. Your child then holds the bottom of the zip and pulls the zip up to the top.
- This step is the hardest to teach. If your child is happy for you to do so, put your hands over your child's when you are teaching this bit. Be patient and only help when they get really stuck.
- When buying clothing with zips test the zip before you buy.
 Make the zip pull easier to hold. Try attaching a zip pull cord, keyring, piece of string or ribbon. This will make it easier to hold and pull.
- If your child has to do a zip on a skirt twist the skirt so that the zip is at the front. Your child will be able to see what they are doing. Once the zip is closed twist the skirt round until it is in the right place.
Buttons
To undo and do buttons, both hands need to work together but make different movements. To help your child be independent at school:
- Choose trousers or skirts with an elastic waistband.
- Choose a polo shirt instead of a shirt for school.
- If they need a shirt go for short sleeves and leave the top button open.
- Look for a coat with Velcro or snap fastenings. You can also buy school shirts with Velcro fastenings.
- Use elastic thread instead of cotton to attach buttons. This will allow your child to pull a shirt over their head with buttons fastened.
Teaching Buttons
 Start by teaching unbuttoning first. It is easier.
- Start with large buttons and work to smaller ones.
- Buttons that are a different colour to the clothes make it easier.
- Make sure that the buttonhole is large enough for the button to fit through easily. Using clothes that have been well worn helps. If the button holes are too tight for your child to manage you can take the buttons off and replace them with slightly smaller ones.
- Make it fun and practice as part of play. Dress teddies and dolls. Get your child to dress up in your old clothes with big buttons or toggles.
- It is easier to practice when your child can see what they are doing. Laying clothes flat on a table or hanging it on the back of a chair can make it easier.
- Push the button part-way through the hole so that it is ‘peeking’ out the other side. Ask your child to pull the button the rest of the way through. Once they can do this, help your child to push the button into the hole for you to pull through. Now put the two parts of the task together.
Going to the toilet at school is more complicated than going to the toilet at home. Your child needs to be able to:
- Ask to go to the toilet
- Find their way to the toilets
- Manage their clothes
- Wipe themselves
- Wash and dry their hands
- Make their way back to the classroom.
You can find information about how to develop these skills in the toileting section.
If your child is not yet toilet trained speak to your Health Visitor and nursery staff for help with this.
If they are still not toilet trained by the end of May the year that they are going to school then speak to school staff too.
Lots of children tell us that their favourite times of the school day are playtime and lunchtime. It is important to think about how your child will manage these parts of school life too. Children are usually encouraged to take a snack for playtime. At lunchtime all Primary 1 children are eligible for a free school meal. Your child might prefer a packed lunch though.
Some children have limited diets for lots of different reasons. This might mean that they do not want to eat what is provided at school. If this is the case it is important that they can access their safe foods and drinks (the ones you know that they will eat) so talk to school staff about your child's safe foods and drinks and work out together how you will manage this.
Packed Lunches and Snacks
There are lots of things to think about. You need to make sure your child can open all the packets and containers to be able to eat and drink. There will be adults around to help but practising at home will boost your child's confidence.
- Choose the right lunch bag
- make sure it is big enough to hold lunch and snack with extra room to make it easy to put everything away when your child is finished
- look for a lunch bag with a zip, make sure it doesn't unzip all the way round as this can be hard to zip up when they are done and add a zip pull to make it easier if you need to
- avoid a lunch bag that is too small and needs things packed in just the right way to fit everything in
- you might need to show them how to open and close their lunch bag and practice with them
- you might need to show them how to put everything back into their lunch bag when they are finished too.
- Choose the right drinks bottle
- most schools will prefer a plastic bottle
- look for something that your child can open easily, a flip up straw or sports cap might work
- avoid pouch drinks/drinking cartons with straws and lids that you need to twist off.
- Think about containers and packets
- snip corners of pre-packaged foods (bars, small bags) so your child can open them
- look for easy to open and close plastic containers you might need to show them how to open and close these.
School Dinners
There are different things to think about when your child has school meals.
- They will need to be able to make choices
- They will need to be able to carry a tray
- They might need to use a knife, fork and spoon.
Again the key is to practice before your child starts school. Offer choices at breakfast time "Would you like toast or cereal?". Get your child to use a tray to carry things around the house.
Learning to use cutlery is also important. Your child will need to use a knife, fork and spoon to be able to eat some of the meals provided at school. There will be adults around to help to start with. Practising at home will help your child to feel confident at school.
For more information have a look at our using cutlery information sheet.
All brains are different and there are different ways to listen and pay attention. Our bodies need to be comfortable so that we can pay attention. This looks different for everybody. Most schools focus on learning through play in the early stages and children need to move around when they are playing. Children have to learn what they need to do to help them concentrate. There are some things that you can do to help me learn what they need. It might take some trial and error to find out what works best for your child. You could try:
Listening and Hearing
 reducing background noise and distractions
- saying your child's name before speaking to them
- getting down to your child's level so you are face to face
- making sure you are close enough that they can hear what you are saying
- keeping your language simple
- checking that your child has heard and understood what you have said
- playing some white noise or preferred music.
Movement and Touch
- letting your child do activities in different positions, they could stand, sit, kneel, squat, lie on their tummy
- giving your child lots of opportunities to move around before and after activities where you need them to sit down
- a fidget tool - some children need something to hold and move in their hands
- a crunchy or chewy snack, a water bottle or chew toy - some children need something to put in their mouths.
Vision
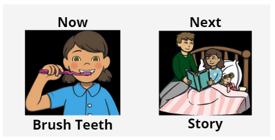
- using visual supports, Now and Next, Visual Checklists, Visual Timetable, Visual Timer
- having areas at home and in your child's room where you reduce visual distractions
- not to expect eye contact when you are asking your child to focus
- thinking about lighting - turn lights off, use soft lighting or natural lighting where possible.
Children learn to write at school but there are lots of things they need to do first. If they start doing these things now it will make it easier for them to learn to write when the time is right. Choose the activities that are right for you and your child.
Please be aware that Playdough (both shop bought and homemade) may contain wheat. Make sure you use a wheat free alternative if there is a known wheat allergy.
Always supervise your child when they are playing with small objects, so they don't put them in their mouths.
Before I learn to write I need to:
Be Strong
I need a strong body and arms. To help me get strong you can encourage me to:
 Crawl - Crawling helps to build the muscles in my tummy, back, shoulders and arms.
- Climb - Climbing and hanging at the park helps me to build my upper body muscles.
- Play - Play can help to build my muscles too. Build me an indoor obstacle course. I could move like an animal; try being a crab, bear, bunny or frog.
- Help - Helping with housework can build my strength. I could carry a shopping bag, vacuum, sweep up, mop, hang up the washing or water the plants.
Use My Hands
I need strong hands and fingers. I need to be able to move my fingers and thumbs. I need to be able to use two hands together. I need one hand to be the leader and one hand to be the helper. To help me do this I need to:
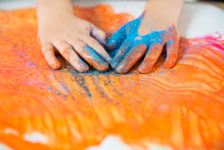 Get Messy - Messy play helps me to explore, build my hand muscles and learn to control my fingers. I could try squeezing and rolling playdough, scooping and pouring sand or water, finding toys in jelly or cooked spaghetti.
- Play - Play helps to make my hands strong, teaches me how to use my hands together and one finger at a time. I could play with pegs, thread beads, put on a show with finger puppets or sing clapping and finger songs (like Tommy Thumb).
- Create - I could build with bricks, make playdough creations, build a jigsaw or create art by ripping and tearing, cutting, gluing and sticking. This helps me to develop hand skills, different grasps and strength.
- Help - Helping at home helps me to get strong hands, learn different grasps and how to use tools. I could bake or cook, wash and dry the dishes, load the washing machine, hang up the washing and fold the clothes.
Scribble and Draw
I need to learn to make marks before I learn how to make letters. To help me learn how to scribble and draw I need to:
 Explore - I need to make marks on different surfaces and in different textures. I could draw in sand, dry rice, shaving foam, playdough. I could draw on the ground, on a wall, under a table, on a table, on an easel.
- Make Marks - Using different tools to make marks helps me to get strong and practice my grasps. I could use a toy car dipped in paint, a stick to draw in the mud, a wet mop to draw on the garden slabs or pavement (keep them away from the road), a spray bottle filled with coloured water (use food colouring) to draw in the snow.
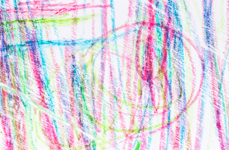
- Colour and Scribble - I need to colour in and scribble to help me learn how to control the marks I am making. I could use chalk, crayons, felt-tip pens, paint and paint brushes.
- Draw - I need to draw different lines (straight, wavy, zigzag, spirals, diagonals) and shapes (circles, crosses, squares, triangles). I need to be able to draw these shapes before I can form letters.
Look at Letters and Words
I need to see letters and words around me. I need to see adults write in every day life. You can help me to:
 Read - I need to look at books with you. You can point out different letters and words.
- Find - I need to look for letters and words when we’re out and about. Look at signs, labels etc.
- Play - I need to play with letters. Hide magnetic or foam letters and go on a letter hunt. Build letters using toy bricks, rocks, playdough, buttons, beads or anything else you can find.
- Help - I need to know that writing is important in everyday life. Write a shopping list or birthday card with me.
Downloadable version of Before I Learn to Write to save or print.
Pencil Grasp
Learning how to hold a pencil is one of the things children need to learn before they learn to write. In nursery and school, children try out lots of different ways to hold a pencil. Most children develop a pencil grasp that is comfortable for them. Watch this video for more information and ideas on how to help.
- Use short pencils or crayons to encourage your child to only use their thumb, pointer and middle finger
- Use chunky triangular pencil/crayons
- Let your child pick up their writing tools themselves
- Do lots of fun drawing and writing activities together using different types of pencils, crayons and chalks.
- Using a slightly angled surface, such as an A4 ring binder placed flat on the table to write on.
- Encourage your child to hold the paper with their helping hand (non-writing hand).
Pre-Writing Shapes
Children need to be able to draw the 9 pre-writing shapes.
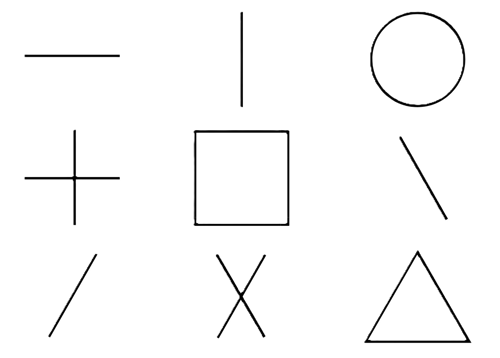
These shapes put together in different ways make up all the letters of the alphabet as well as the numbers. This video explains what the pre-writing shapes are. It shows you how to help your child practice these shapes.
The following websites are good for additional information and activities for the pre-writing stage:
Children will use scissors when they start primary school. Practising now will give them confidence to try at school. Children learn to use scissors a step at a time. They learn:
- Correct grasp
- To open and close scissors
- To snip
- To cut
- To cut along a line
- To cut out shapes.
Being able to use scissors effectively and safely can help children to demonstrate their learning.
Always supervise your child when they are using scissors.
Teaching Scissor Skills
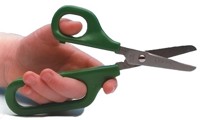
Choosing Scissors
- Child sized scissors are easier to hold
- Short blades are easier to control
- Rounded tips are safer
- Provide left handed scissors if needed
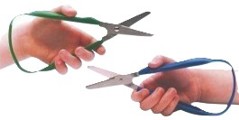
If your child finds standard child sized scissors difficult to use, they could try:
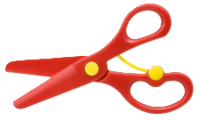
- Easi-Grip Scissors - the loop handle allows the scissors to automatically open when pressure is released.
- Long Loop Scissors - the longer loop allows the middle, ring and pinky fingers to be used to open/close the scissors, with the index finger being used to control on the outside.
- Spring Loaded Scissors - these scissors automatically re-open after each cut.
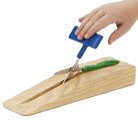
- Mounted Table Top Scissors - these scissors are self-opening with the spring automatically opening the scissors ready for the next cut. These scissors can be used one-handed. It is recommended that the stronger hand manipulates the position of the paper whilst the weaker hand operates the scissors.
When purchasing any of the above items please shop around as prices may vary.
Materials to Cut
It is best to start with things that require only one snip. This list goes from easiest to hardest:
- A playdough sausage
- Straws (these can be threaded to make a necklace)
- Thin cardboard, 2cm wide strips
- Firm paper, 2-20cm wide strips
- Paper with a thick straight line to cut along (start with a 10cm wide strip of paper)
Scissor Safety
Teach rules about how to use scissors safely
- Make sure scissors are out of reach when not in use
- Teach them how to carry scissors with blades closed in their fist, handles up
- Make it clear what they can and cannot cut, like paper, card but not hair or clothes
- They need to be sitting down to cut
- Teach them how to hold the scissors and paper and to cut safely
- Don't point or wave scissors near other people
- Teach them to only use scissors when an adult is watching
How to Hold Scissors
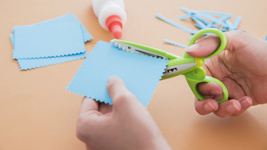 It is easiest to hold scissors in your doing hand with your thumb in the top loop and your index finger in the bottom loop. Teach your child to keep their thumb on top when cutting. Your child should hold the paper in their helping hand with their thumb on top and their other fingers curled underneath. It helps to keep your elbow close to your body when cutting. If your child is finding this tricky, get them to hold a beanbag or pair of socks between their elbow and their side when they are cutting. You could try marking the thumb hole with a piece of coloured tape so your child knows where to place their thumb.
Using Scissors
- Get your child to practice opening and closing the scissors.
- Once they can open and close the scissors, teach them to snip (a snip is one cut). Start with playdough straws and strips of card (1cm wide).
- When they can snip, move onto wider strips until they are able to open and close the scissors while moving their cutting hand forward.
- Now practice using different materials, such as foil, thin card, cardboard, paper or playdough.
- Once the child is able to snip and cut card, move onto paper. Stick lolly sticks or straws on paper in straight lines and encourage your child to cut between sticks.
- Now draw a thick solid straight line for your child to cut along. As they improve, make the lines thinner.
- Teach them to move the paper with their helping hand while they are cutting instead of trying to turn the scissors.
- Now give them curvy lines, zigzags, squares, triangles and circles to cut.
For more information about your child starting school visit:
- Parent Club has some top tips from mums and dads for some fun games you can play in the holidays so you can both look forward to starting school.
- Parentzone Scotland provides information on starting school looking at when your child starts school, how will your school help with the transition and how Parentzone Scotland can help.
- Parenting Across Scotland provides the top ten tips for parents and families when you or your child is anxious to start school.
- They also provide top tips for parents and families for starting school as well as information for parents who have learning disabilities.
- BBC Bitesize has lots of resources for you and your child to watch.
There is more information about your child's development from the ages of 5 to 12 years in our Primary School section.